Thursday 28 February 2013

Brightness contrast and tint


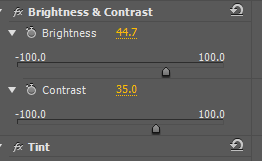
This screenshot is of the brightness and contrast tool which we used to change the lighting and to brighten up the clips. We felt it worked really well on several of them, and others seemed to look very grainy and unreal, which didn't really work. We are not particularly happy with the lighting of the performance, but we did not realise the value of the lighting until we came to editing, and could not find a suitable date to re-shoot and felt we would not be able to get the same kinds of shots we did in that first shooting. we have done the best we can with the footage we have, but this is something we would look at if we could go back and re-film.


We then applied the effect of 'tint' to a couple of clips to add highlights of blue to make them brighter, or seem brighter. We tried it on one clip and it worked really well, but did not seem to have the same effect on some of the others we used it on. The toggle bar at the bottom shows and allows us to choose how much blue is applied to the imagery, and the image shows that 1/6th of the 100.0 was applied to get the desired effect.

Finished Video test


 This is our finished video.. after all our hard work, stress, crying and panicking..

we are still looking into what we can do with the lighting before the deadline

28th February- in free time

Me and Amy have met up in the free before the lesson to work on the lighting concerns which were brought forward yesterday about a couple of our performance clips. We decided to alter the brightness and contrast of some clips to brighten them up so they fitted more into the brighter clips we filmed. There were a couple which went really grainy and did not look right when we brightened it up, so we decided to replace these clips with brighter ones, still using the same level of lip-syncing. We replaced one clip with an extreme close up as we felt we hadn't included many near the start and it geared them up for the remaining ones in the video.


Wednesday 27 February 2013

Video editing technique practice


we slowed this panning of matt down using the speed/duration option in the software. He then goes to smile to his right, which we have used in a non-singing part of the video

Editing- Wed 27Th Feb

We are close to finishing our video!

we are looking at changing a few things around, and then starting to use a colour balance to make all of the clips the same levels...

we did this by nesting all of the clips together, by highlighting them all and right clicking then selecting 'nest'
-this made all the clips bond together. we then applied the effect 'colour balance' to the one big clip and played around with the levels until we were happy with the outcome. It took a bit of time and we resulted to changing certain and specific clips rather than them all ...

Tuesday 26 February 2013

Blurring some clips


We have used the effect of some camera blur on the clips of matt and lily together to gain the sense of flashback. We want to show the audience about how happy Matt and Lily were together before the break up (shown at the start) then as the song progresses he remember and recollects some times where they were happy.

We did this by applying 'Camera blur' to the chosen clips and then altering the amount of 'blur' which is added... we suggested the amount of '2', as it was still visible to see what was happening and used the same blue type across all chosen clips.

We also applied a spot light to the clip, which highlights the main focus of Matt and Lily. It also makes the memory seem more distant than if it was just normal light which makes it more significant.

Post-Production


We have altered the opacity to merge these two extreme close ups of matt singing at different angles together.

As one fades out, the other fades in, and it looks much better than if it just cut from one to the other.

Fourth Instalment


This is a Fourth update of our video so far. we have used some of the footage from our final filming day to create the sense of a second narrative although it is broken up by the car and performance.

We put it on Youtube and also Facebook and got the following comments:


The feedback so far is very positive and people seem to really like it. My uncle even shared the video to get more views! He even thought that Matt was actually singing and he created it.


The father of one of the guitarists has also shared our video in order to get the best feedback we can, and the fact they are sharing it suggests they are proud of their Son and want to show the world.

Monday 25 February 2013

In the making


we have created a video of all the days where we filmed, with who was filming and the encouragement we gave the actors. we thought this would be a really good way to express some of the ideas which were decided on the day and what we got up too.

We filmed the band and myself setting up the lighting and using the camera. We also included all of us using the camera to show that we were all involved in the filming and creation of our video.

Sunday 17th Feb

Final filming day.
We went down the road to Perdiswell park to film the final scenes needed for our music video. We only needed the actors of matt and lily so me and grace met down there. We filmed lots of extreme close ups as discussed and different angles of matt and lily together.

Friday 15 February 2013

Car situation

Although I spoke to my neighbor and he suggested filming with his car when the weather picked up, we have decided to stick with using the Audi as we have nearly finished the editing and it will take a lot of time to change things as we have put everything into shot. We also like the concept of the modern car and it fits the genre and song nicely.

1 shot, 3 Clips


This video shows our attempts of using several different clips on the screen all at the same time. We decided to use a quirky approach of using different methods of getting the clips onto the screen. This attempt shows the clips being brought on from left, to right and then center and it adds much more excitement and different elements to look at in the video.

We have now decided to use this technique many more times within our video, than just the once, but using it in different ways to add even more excitement and to ensure the audience does not get bored.


Tuesday 12 February 2013

In the making- rough


This is a sneak preview of our 'making of video.' It is in poor quality because it is a test run but shows how we made our videos and the decisions we have made throughout the process.
We decided to create a video of us making the video as we thought that it would be more ideal, to see what kind of things we got up to on our journey and how we set everything up, along with the mistakes and how we kept our cast motivated.

Inspiration

after looking at other colleges videos, we liked the idea of having the slip screen of different clips to add more excitement.
at 16 seconds in, is the area which we were looking at.

We did this by cropping the parts of our clips which we wanted, often taken from different angles and shots, then positioning them next to each other with a black boarder using the layering on Premiere Pro. We also had to scale the clips to ensure the black boarder was the same width with each shot. This took a little bit of time because we kept having to move the clip above to access the underneath clip. We also varied the lengths of time each clip was on the screen for so we gained the effect of one clip appearing after another.


Monday 11 February 2013

3rd video instalment

This is the third video we have put onto youtube for feedback.


we currently got no feedback for this video.We are hoping when the video is finished, we will get much more feedback we can work within our evaluation

final Filming day

we have decided to use this Sunday for any pick up shots and the filming of matt and lily together. We will also focus on extreme close ups of their faces and movements and not keep the camera totally still.

Monday 11th Feb

we talked to our teacher and he suggested using more close ups. Above is a screen shot of a close up we have picked out of my brother singing. We have used several of these shots throughout the video and we have planned to film a couple of extreme close ups of singing.

Sunday 10 February 2013

second installment


This was our second instalment of our video which hit youtube. We have used the razor tool much more to create an energetic sequence which is something we are still working on.

Thursday 7 February 2013

Possible editing


The first video shows us experimenting with the opacity of two clips so one image fades into the other. We were told this did not look right in our genre of music, so we are looking into what else we could do.

The second video is a slow motion of Ben on the drums. We are unsure on whether to use this because all of the other guitarists are stood still and not doing anything.

Skyping grace

Grace has left us and gone on holiday, so we decided to Skype call her during our lesson so she could still participate in the editing of our video.

We showed hoer what we had done in the lesson and she seemed to really like it,.

Here are some pictures of us Skyping her and showing her our progress.

Tuesday 5 February 2013

1st Installment


We uploaded our video so far to Youtube to get some feedback off our target audience.

The overall feedback was excellent, but they did not quite get the grasp of all the black areas will eventually be filled with clips. No matter how much we told them, they still commented on it. This showed us how important each clip is, in a music video, and if something is left for too long, then they will not understand the idea or like it. We have been looking into our clips in more detail and how we can use the energy of the song into the clips we use.

Youtube

We have exported what we have done so far, and put it on youtube, to get feedback from our target audience.


They did not seem to understand the blackness would eventually disappear, but they liked the video overall.


Tuesday 5th Feb

We have edited the beginning a lot, so we have focused on the ending today. We looked at the shots of the window and selected the most interesting and best areas and used them for our cliffhanger ending. We put a zooming in shot of the window outside of the music at the end, as matt looks up and altered the opacity of the shot so it fades out, signifying the end of the video.

Monday 4 February 2013

Monday 4th Feb

Today we focused on using the razor tool, to cut up clips and to make them shorter and rearrange them to create a quirky and energetic sequence

Friday 1 February 2013

Razor tool

We have just learnt about the razor tool and how it splits up clips to eject some more pace, sound and energy into the video. When the razor tool is selected, we are able to cut up clips into smaller ones and tyhen rearrange them to gain a more excitable feeling.